Maze Bomber Game: The Definitive Tips, Strategy, and Tactical Guide to Dominating the Grid
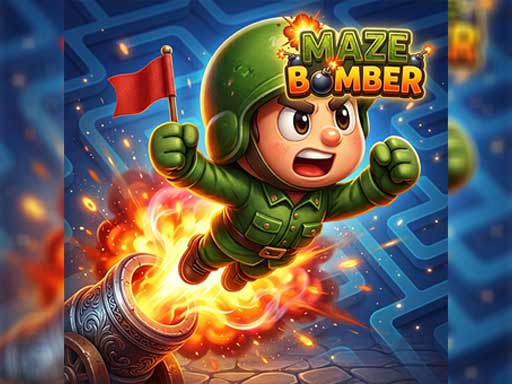
The maze bomber genre has stood as a hallmark of tactical arcade gaming for decades, combining lightning-fast reflexes with rigorous spatial calculations. In Maze Bomber, players are dropped into a constrained labyrinth packed with destructible barricades, indestructible pillars, wandering adversaries, and cunning rival bombers. The premise is deceptively simple: deploy explosive ordinance to clear obstacles, uncover essential power-ups, and corner your opponents in lethal crossfire. Beneath this approachable surface, however, lies an unforgiving mechanical depth where a single misplaced bomb or a microsecond hesitation can result in immediate self-destruction. Success is not achieved through frantic bomb spamming, but through deliberate zoning, accurate blast estimation, and calculated pathway manipulation.
Whether you are stepping into the explosive labyrinth for the very first time or looking to sharpen your competitive edge against seasoned tournament veterans, mastering Maze Bomber demands a structured approach. Every match evolves through distinct phases, beginning with fundamental mechanical control and early-game clearing routines, expanding into mid-game territorial dominance, and culminating in high-pressure sudden death duels. This comprehensive manual breaks down the core systems, movement physics, item priorities, and psychological warfare necessary to climb the ranks. By internalizing these battle-tested strategies, you will transform chaotic maze scrambles into methodical masterclasses in tactical demolition.
1. The Fundamentals of the Grid: Core Controls and Spatial Awareness

Every match in Maze Bomber takes place on a rigid, coordinate-based grid where movement, collision, and blast propagation follow strictly defined mathematical rules. Navigating this labyrinth requires you to understand how your avatar interacts with the geometry of both permanent hard blocks and fragile soft blocks. Precision input is critical; because movement is tied to discrete tiles, overshooting an intersection or brushing against a wall can cause your character to stall for crucial frames. Developing clean orthogonal inputs—moving precisely up, down, left, and right without accidental diagonal friction—is the foundational skill upon which all advanced competitive techniques are built.
Spatial awareness in Maze Bomber is not merely about knowing your current location, but constantly reading the immediate four cardinal directions relative to incoming threats. The typical explosion propagates in a cross pattern (North, South, East, and West), penetrating through empty air and destroying the first soft block it encounters in each branch. Unbreakable stone pillars halt blast waves completely, serving as your primary shields. Cultivating the instinct to naturally gravitate toward these permanent safe zones ensures that you always have an escape pocket available when an unexpected chain reaction ripples across the board.
Mastering Collision Geometry and Movement Buffering
Modern iterations of Maze Bomber feature subtle corner-turning mechanics that can either accelerate your escape or trap you against a hard edge. Understanding how the game engine handles input buffering around corners will give you an immediate speed advantage over unpracticed opponents.
Key Structural Elements of the Maze
- Hard Blocks (Indestructible): Symmetrical stone pillars that cannot be destroyed by any regular explosion, providing absolute cover against straight-line blast waves.
- Soft Blocks (Destructible): Wooden crates, dirt mounds, or fragile barriers that absorb explosive hits, vaporize instantly, and occasionally yield valuable power-ups.
- Corridors and Choke Points: Single-tile lanes where escape options are strictly binary, making them prime territory for ambushes and inescapable blast traps.
- Corner Anchors: Intersection tiles directly adjacent to hard blocks, serving as quick-turn pivot points for ducking behind cover.
2. Early-Match Routine: Optimized Clearing and Pathway Expansion
The opening five to ten seconds of a Maze Bomber match dictate your trajectory for the rest of the round. At the spawn point, each player is typically boxed in by an array of soft blocks, with only two immediate directions available for movement. Inexperienced players often drop a bomb immediately upon spawning and panic, retreating into a dead end while waiting for the fuse to burn. This passive approach wastes precious seconds while your opponents expand their territory, uncover items, and prepare flanking routes. Your primary objective during the opening seconds is to establish a recursive clearing cycle that keeps your character moving continuously forward without idling in spawn pockets.
To execute an optimal clearing sequence, plant your first bomb against two or three adjacent destructible blocks, immediately step back into your corner nook, and identify your next two potential moves before the first blast detonates. The instant the blast clearing animation concludes, advance past the vaporized blocks without hesitation to place your second charge. By maintaining continuous forward momentum, you carve wide arterial avenues into the maze, securing early access to the center stage where the highest density of power-up drops and strategic vantage points reside.
The "L-Drop" and Linear Excavation Techniques
Efficient clearance relies on maximizing the number of blocks touched per explosive charge. Avoid detonating a bomb that only contacts a single destructible block unless it directly opens a critical corridor to an essential power-up or prevents an aggressive rush from an adjacent rival.
Opening Protocol Checklist
- Identify Drop Orientation: Prioritize clearing pathways that lead toward the center of the arena rather than the map borders to maximize your operational footprint.
- Synchronize Movement with Fuse Timers: Step out of safety the exact millisecond the fire graphic dissipates to minimize clearing downtime.
- Preserve Escape Routes: Never plant a bomb if backing into your designated safe pocket leaves you trapped by an uncleared obstacle behind you.
3. Power-Up Hierarchy: Deciding What to Grab and What to Guard
As destructible blocks crumble, the arena floor becomes littered with power-up icons that alter your offensive and defensive parameters. Not all upgrades offer equal value at every stage of the game, and blindly rushing over every glowing icon can lure you into lethal ambushes or leave you burdened with uncontrollable speed. Establishing a rigorous mental hierarchy allows you to prioritize high-impact upgrades, ignore situational bait, and actively deny game-changing power-ups to nearby competitors through strategic destruction or lane zoning.
The triumvirate of basic power-ups consists of Fire Up (increasing blast radius by one tile), Bomb Up (permitting an additional simultaneous bomb placement), and Roller Skates (boosting base movement speed). In the early game, bomb capacity takes precedence, as it directly speeds up your excavation rate and allows you to establish multi-tile barriers. In the mid-game, blast length takes over, transforming your localized detonations into map-spanning lines of fire that can snipe unsuspecting enemies across vast distances. Speed upgrades must be acquired deliberately; while one or two pairs of skates provide vital agility, stacking too many can cause input slippage, causing you to slide unintended tiles directly into live explosions.
Categorizing Maze Upgrades by Strategic Value
Understanding which tools fundamentally alter match dynamics enables you to adapt your playstyle the instant an item appears on the board.
Power-Up Tier List and Deployment Utility
- Tier S (Game Changers):
- Remote Detonator: Grants manual trigger control over your bombs, enabling precision ambushes and completely eliminating fuse vulnerability.
- Bomb Kick: Allows you to launch planted bombs sliding down open corridors, turning stationary hazards into moving artillery.
- Tier A (Core Performance):
- Bomb Up: Stacks total active capacity, essential for laying complex multi-directional grid traps.
- Fire Up: Extends cardinal reach, shrinking your opponent's available safe zones across the maze.
- Tier B (Utility & Defense):
- Roller Skates: Increases movement velocity; highly beneficial when capped at comfortable handling speeds.
- Power Glove / Punch: Permits lobbing bombs over intervening walls to disrupt turtling adversaries.
- Tier C / Situational (Risk-Reward):
- Max Fire / Full Fire: Instantly sets blast radius to maximum board length; immensely lethal, but significantly increases your own risk of friendly-fire accidents.
- Skull / Curse: Inflicts unpredictable ailments (involuntary bomb drops, reverse controls, extreme speed or lethargy); strictly avoid unless desperate.
4. Navigating Danger: Surviving Blast Lines and Fuse Timing
Survival in Maze Bomber hinges on mastering the fundamental fuse clock: the precise duration between placing a bomb and its explosive payload erupting. Standard fuses burn for roughly three full seconds. During this window, you must plant your explosive, clear the danger zone, position yourself behind hard cover, and anticipate the blast trajectory. Panic is the primary killer of intermediate players; when multiple bombs begin ticking in a confined corridor, novice players frequently freeze, reverse into dead ends, or walk directly into lingering fire lines because they misjudged the burn duration.
Surviving complex crossfire scenarios requires you to recognize that bomb explosions are physical barriers in their own right. An active explosion remains lethal on its tiles for a fraction of a second (typically 20 to 30 animation frames). Moving into a tile while the flames are still visually expanding is lethal, yet entering that exact tile immediately as the flame fades allows you to reclaim space before your rival can react. Developing a rhythmic internal metronome for fuse countdowns transforms stressful, chaotic scrambles into calm, calculated lateral dodges around hard pillars.
Tactical Blast Calculation and Safe-Tile Identification
Never rely on visual guesswork when measuring blast distances. Always count the physical tiles between your avatar and the explosive origin to verify that you are outside the fire zone.
Defensive Survival Protocols
- The Pillar Hug: Always position your character diagonally adjacent to an indestructible block. This guarantees a safe tile only a single directional input away regardless of which orthogonal direction a blast travels.
- Chain Reaction Mitigation: When multiple bombs are laid consecutively, their fuses synchronize to the earliest detonation. Always calculate your escape timing around the first bomb that was laid, not the one closest to you.
- Blind Alley Avoidance: Never pursue a loose power-up down a narrow, dead-end corridor without verifying that every enemy in the sector is physically incapable of sealing the entrance behind you.
5. Decoding Enemy AI: Monster Movement Patterns and Countermeasures
In single-player adventure runs and cooperative maze campaigns, your primary adversaries are computer-controlled monsters rather than human bombers. Unlike human opponents who operate on psychological reads and adaptive tactics, AI enemies adhere to distinct behavioral programming routines. Some monsters mindlessly bounce between walls like billiard balls, while others sniff out your exact grid coordinates through wall barriers, phase through solid blocks, or pick up speed when aligned with you along a straight axis. Treating every monster alike is an express ticket to an early defeat.
To eliminate wandering creatures without putting yourself in danger, you must learn to herd them into your pre-set blast cones. Basic wandering enemies reverse direction upon hitting obstacles, making their trajectories entirely predictable. By planting a bomb two tiles ahead of their walking path and retreating behind cover, you can lure them directly into the blast window. Advanced monsters that actively track your avatar demand zoning tactics: plant a bomb to block your immediate retreat lane, pull the monster toward you, and then slip around a hard block corner just as the trap snaps shut.
Classifying Hostile Maze Fauna
Each category of maze monster requires a tailored behavioral counter to ensure clean, damage-free eliminations.
Common AI Behavioral Profiles
- Random Roamers: Slow-moving ground units that turn randomly at intersections. Counter them by laying mid-lane bombs and waiting at a distance.
- Aggressive Trackers: Relentless pursuers that calculate the shortest path to your coordinates. Counter them by laying trailing bombs behind you while running through linear corridors.
- Wall Phasers: Lethal apparitions capable of moving directly through soft blocks, ignoring maze walls. Counter them by luring them into open hard-block intersections where clear lines of fire can vaporize them before they slip back into cover.
- Speed Chargers: Normally docile enemies that sprint at double speed the instant you cross their line of sight. Counter them by standing behind hard blocks and baiting their charge into an armed blast corner.
6. Mid-Game Spatial Control: Trapping Lanes and Bottleneck Warfare
Once the central soft blocks have been excavated and combatants possess expanded blast ranges and multiple bomb reserves, Maze Bomber shifts from a race for resources into a tactical territorial struggle. The board becomes an open arena intersected by hard block pillars, where controlling the major corridors dictates who lives and who dies. Spatial control is achieved by turning accessible transit lanes into hazardous no-go zones. By maintaining a presence at key central junctions, you restrict your rival's movement options, forcing them back toward the claustrophobic borders of the arena.
Bottleneck warfare revolves around creating synthetic cul-de-sacs. Even if a corridor has two open ends, dropping a bomb at one exit instantly converts that corridor into a dead end for anyone inside it. If you have sufficient bomb capacity, you can execute a "Double Pinch"—planting a bomb at an opponent's front escape route, rounding the exterior pillar, and planting a second bomb at their rear exit. Trapped in a one-tile corridor between two ticking charges, the opponent is completely helpless unless they possess specialized defensive items like the Kick or Punch.
Zoning Mechanics and Territory Denial
Effective zoning does not require scoring an immediate kill; it is about steadily stripping away an opponent's viable real estate until their safe operating area is reduced to zero.
Advanced Lane-Dominance Tactics
- Staggered Wall Deployment: Lay bombs in a zigzag diagonal pattern across adjacent lanes. This prevents opponents from making direct lateral cuts and forces them to weave through dangerous choke points.
- Power-Up Trapping: Intentionally leave a high-value item (such as a Remote Detonator or Kick) uncollected in an open lane. When your opponent moves to claim it, detonate an intersecting line of fire or seal their exit to punish their greed.
- The False Retreat: Feign a backward retreat down a long corridor to bait an aggressive rival into pursuing you, then drop a bomb, kick it backward into their face, and slip out via a side lane.
7. Advanced Ordnance Mechanics: Kicking, Throwing, and Remote Detonation
The acquisition of advanced utility upgrades fundamentally shatters the standard rules of grid movement. When you acquire the Bomb Kick, your bombs cease to be static area-denial obstacles; they become dynamic, high-speed projectiles that slide down lanes until striking a wall, an enemy, or another explosive. Mastering the Kick requires precise timing to stop moving bombs precisely where you want them. By tapping the stop button (or kicking a bomb directly into an intersecting block), you can park ticking charges directly adjacent to turtling rivals who thought they were safe behind hard cover.
The Power Glove and Punch abilities introduce a vertical dimension to an otherwise flat battlefield. Being able to loft an armed explosive completely over hard blocks and soft barriers allows you to bypass defensive choke points entirely. If an opponent has sealed themselves inside a defensive pocket waiting for their own bombs to detonate, tossing an additional bomb over the wall into their cramped cell creates an unavoidable disaster. Meanwhile, the Remote Detonator transforms Maze Bomber into a game of pure psychological ambush: you can plant a bomb in a busy transit lane, walk away nonchalantly, and detonate it the exact frame an opponent steps onto its blast axis.
High-Level Mechanical Execution
Integrating these kinetic upgrades into your combat loop demands precise input timing and comprehensive spatial awareness.
Specialized Ordnance Maneuvers
- The Sliding Strike (Kick): Drop a bomb while running forward, instantly kick it toward an opponent, and follow closely behind it to exploit the space it clears.
- The Header Bounce (Glove): Pick up an armed bomb and throw it so that it bounces off an opponent's head, briefly stunning their movement frames while the fuse burns down to zero.
- Cross-Screen Remote Sniping: Place a remote bomb at a major cross-junction, relocate to the opposite side of the screen, and monitor your opponent's footwork, manually detonating the instant their sprite enters the kill lane.
8. Multiplayer Mind Games: Bluffing, Cornering, and Counter-Play
In high-level multiplayer matches against human opponents, mechanical competence is merely the baseline requirement; victory is decided in the psychological arena. Human players exhibit behavioral habits: some panic under pressure and instinctively dart toward the bottom-left corner of the board, while others aggressively contest every dropped item or rely excessively on kick mechanics. Observing and exploiting these subconscious patterns during the first round allows you to construct tailored traps that exploit your opponent's cognitive biases in subsequent rounds.
Bluffing is an exceptionally potent weapon in competitive Maze Bomber. By aggressively advancing down a corridor toward an opponent with multiple bombs ticking nearby, you can force them to assume you have a concrete escape route planned. Panicked opponents will frequently retreat into compromised positions, abandoning valuable ground or trapping themselves behind their own defensive drops. In reality, you can abort your push at the final intersection, leaving your opponent stranded in a corner while your primary trap detonates across their only avenue of escape.
Countering Common Competitive Archetypes
Recognizing the playstyle of your adversary allows you to select the appropriate tactical countermeasure before they can execute their game plan.
Opponent Profiling and Strategic Counters
- The Hyper-Aggressive Rusher: Constantly charges your side of the board looking for quick traps.
- Counter: Play defensive drop-and-fade patterns. Leave trailing bombs in single-tile lanes and let their own forward momentum carry them into your blast zones.
- The Corner Turtler: Boxes themselves into an uncleared corner of the map, daring you to approach their fortress.
- Counter: Starve them of resources. Collect all center-stage power-ups, boost your blast radius to maximum, and use Bomb Punches or sliding kicks to bombard their bunker from complete safety.
- The Kick Spammer: Stays at long range and launches endless streams of sliding bombs down open corridors.
- Counter: Stand immediately behind a hard block near their firing lane. As their kicked bomb slides past your pillar, step out and kick it back, or plant an interceptor bomb to prematurely stop their projectile in their own half of the map.
9. Surviving Sudden Death and Shrinking Mazes
When the match clock ticks down to its final sixty seconds and no victor has emerged, Maze Bomber activates its most ruthless mechanic: Sudden Death. The arena begins to contract as massive, indestructible iron blocks rain down from the sky in a clockwise spiral pattern, crushing any player caught underneath and permanently sealing off the outer rings of the maze. The expansive labyrinth you spent minutes navigating is aggressively compressed into a cramped, chaotic four-by-four or five-by-five kill box where every tile becomes an active danger zone.
Surviving the falling block phase requires an intimate knowledge of the spiral drop sequence. Blocks fall in a predictable clockwise trajectory starting from the top-left outer perimeter and working inward layer by layer. Positioning your avatar just behind the falling block vector allows you to occupy tiles that have already transitioned safely without running the risk of having an iron block drop directly onto your head. Never look at the center of the board during this transition; keep your eyes fixed on the sky shadows to identify the landing sequence of the next three falling blocks.
Navigating Compressed Micro-Arenas
Once the perimeter has collapsed, the dynamic of the match completely transforms. Long-range blast builds become just as dangerous to their user as they are to the target.
Sudden Death Survival Imperatives
- Micro-Stepping in the Center: Fight relentlessly for ownership of the central four tiles before the outer perimeter finishes collapsing, as the center provides the maximum number of lateral dodging choices.
- Drop Single Bombs Only: Laying multiple bombs in a compressed 5x5 arena invariably creates unavoidable chain reactions that wipe out everyone on the board, resulting in a frustrating draw.
- Execute the "Suicide Squeeze": If you possess a shield or extra heart power-up, deliberately plant a center bomb that fills the entire remaining chamber; your extra life will absorb the explosion while your opponent is eliminated.
10. The Master Bomber’s Regimen: Practice Drills and Tournament Mindset
Achieving true mastery in Maze Bomber transcends occasional casual play; it demands structured, deliberate practice routines designed to build muscle memory, reduce input latency, and build emotional resilience under tournament pressure. Elite players do not rely on luck or chaotic scrambles. They execute high-speed inputs with surgical precision, effortlessly parsing dozens of moving elements across the screen without succumbing to visual sensory overload. To reach this level of performance, you must isolate specific mechanical techniques and drill them repeatedly in controlled practice environments.
Beyond mechanical execution lies the psychological stamina required to maintain composure through grueling multi-round sets. In a game where rounds can end in three seconds due to an accidental micro-step, mental tilt is your greatest enemy. Cultivating a calm, analytical mindset allows you to instantly process an untimely self-elimination not as a frustrating failure, but as objective data regarding your positioning and timing errors. By pairing structured training routines with emotional discipline, you cultivate the unshakable focus characteristic of top-tier competitive champions.
Core Training Drills for Grid Perfection
Integrate these focused exercises into your regular training sessions to sharpen your inputs and expand your tactical processing speed.
Essential Daily Drills
- The Cornering Time-Trial: Load an empty custom board with maximum speed skates. Navigate tight, continuous S-curves through hard block pillars without brushing or snagging against a single wall.
- The Kick-Stop Precision Drill: Equip the Bomb Kick and practice launching a sliding bomb down a long lane, stopping it instantly on a designated target tile by tapping the brake button.
- Chain-Reaction Calculation Training: Lay three bombs of differing blast radii in complex, overlapping intersections. Predict the exact boundary of safe tiles before the first charge detonates, step onto that tile, and hold your ground without flinching.
- Low-Resource Survival Challenge: Enter high-difficulty bot matches while deliberately refusing to pick up any Bomb Up or Fire Up upgrades, forcing yourself to secure victories purely through superior movement, positioning, and timing.
Mastering Maze Bomber is an ongoing pursuit of spatial awareness, split-second risk assessment, and tactical adaptability. By starting with solid mechanical fundamentals, executing efficient clearing routes, respecting the power-up hierarchy, and decoding both AI routines and human psychology, you systematically eliminate randomness from your matches. As you integrate these advanced movement techniques and spatial traps into your regular gameplay, the maze ceases to be a chaotic labyrinth of hazards; instead, it becomes your personal arena where every corridor and block bends to your strategic will. Step onto the grid with confidence, command your territory, and let your explosions pave the path to victory.
Summary:
Master the Maze Bomber grid with this definitive tactical guide. Learn clearing routines, power-up tiers, blast safety, trap tactics, and sudden death survival.