
Royal Match: The Ultimate Strategy Guide and Masterclass
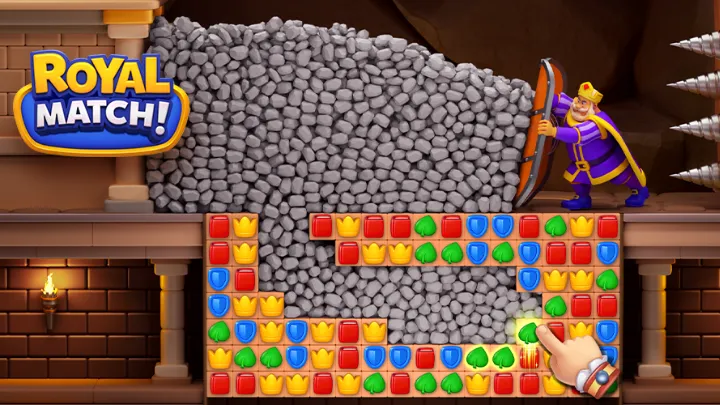
Royal Match has firmly established itself as a titan in the mobile gaming industry, captivating millions of players with its vibrant aesthetics, smooth gameplay, and the refreshing absence of third-party advertisements. At first glance, the game appears deceptively simple: help King Robert restore his magnificent castle by solving match-3 puzzles. However, beneath the colorful graphics and cheerful sound effects lies a deeply strategic game that punishes careless moves and rewards tactical foresight. As players progress from the tutorial stages into the thousands of levels, the difficulty curve spikes sharply, transforming a relaxing pastime into a rigorous mental challenge.
To succeed in Royal Match, you cannot rely on luck alone. While the Random Number Generator (RNG) plays a role in how tiles drop, the consistent winners are those who understand board physics, economic management, and probability manipulation. This guide is designed to take you from a casual swiper to a master tactician. We will dissect the hidden mechanics of the game, explore the mathematics behind booster combinations, and provide a roadmap for managing your in-game resources so that you never find yourself stuck on a "Super Hard" level without a lifeline. Prepare to renovate the castle, one strategic move at a time.
1. Mastering Board Physics and Vertical Gravity
The most fundamental skill in Royal Match is understanding how gravity affects the board. Unlike some puzzle games where tiles might fill in diagonally or randomly, Royal Match adheres to strict vertical columns. When tiles are cleared, the pieces above them fall straight down. This predictability is your greatest asset. Before you make a match, you should mentally simulate the fall. Ask yourself: "If I clear these three red shields, where exactly will the green book fall?" By visualizing the outcome, you can set up "cascades"—chains of automatic matches that occur as tiles settle.
Playing from the bottom of the board is a golden rule derived from this gravitational logic. When you make a match at the top of the screen, you only affect the few tiles immediately involved in the match. However, when you make a match at the very bottom, you shift the entire vertical column above that point. This maximizes the movement on the board, statistically increasing the chances of creating accidental combos or bringing down fresh tiles that you desperately need. Always scan the bottom rows first; only play near the top if you have a specific, high-value move or an urgent objective located there.
The "Spawn Point" Mechanic
A crucial, often overlooked mechanic is the specific spawn location of boosters. When you match four or five tiles to create a power-up, the power-up appears at the exact position of the tile you swiped to complete the match. This is not random. If you have a horizontal line of three yellow crowns and you swipe a fourth one down into the middle, the rocket or propeller will spawn in that middle slot. By manipulating where you close the match, you can place explosives exactly where they are most effective, such as next to a hard-to-reach durability block.
2. The Advanced Arsenal: Booster Mechanics Deep Dive
To beat levels consistently, you must move beyond basic match-3s and start hunting for patterns that create the "Big Four" boosters: Rocket, TNT, Propeller, and Light Ball. The Rocket is created by matching four tiles in a line. Its direction (vertical or horizontal) depends on the direction of your swipe—a vertical swipe creates a vertical rocket, and a horizontal swipe creates a horizontal one. Rockets are your snipers; use them to hit objectives on the opposite side of the board or to clear a specific row that is blocked by walls.
The TNT barrel, created by matching five tiles in a T or L shape, is your heavy artillery. It clears a significant radius around it. The Propeller, created by matching four tiles in a square, is unique because it is "smart." Upon activation, it clears adjacent tiles and then flies to a specific target on the board. The Light Ball, created by matching five tiles in a straight line, clears all tiles of a specific color.
Understanding Propeller AI
The Propeller is often the most valuable tool for beginners, but it has a specific hierarchy of targeting logic. It prioritizes level objectives above all else. If you have to collect red books, the propeller will target a red book. However, if there are multiple objectives, it generally targets the one that is hardest to reach or aids in clearing a blocker. Be warned: if you have a clear shot at an objective with a basic move, do not waste a Propeller on it. Save Propellers for "islands"—parts of the board that are disconnected from the main play area and cannot be reached by normal matching.
3. Synergy Mastery: The Art of Combining Boosters
While individual boosters are powerful, combining them is the only way to clear the "Super Hard" levels found later in the game. When two boosters are adjacent, you can swap them to trigger a combined effect that is far greater than the sum of its parts. The most destructive combination in the game is the Light Ball + TNT. When mixed, this turns every single tile of the Light Ball's color into a TNT barrel. If you have ten blue tiles on the screen and mix a Blue Light Ball with a TNT, you get ten simultaneous explosions. This usually wipes the entire board, resets the layout, and completes massive chunks of the objective.
The Light Ball + Rocket is a close second in terms of power. This combination turns all tiles of the matching color into Rockets, which then fire off in random directions (horizontal and vertical). This is excellent for "sniping" scattered objectives. Other notable combos include the TNT + Rocket, which creates a massive cross-shaped blast that clears three rows and three columns (a "thick" rocket), and the Double Propeller, which launches three homing missiles instead of one.
The "Wait and See" Strategy
A common mistake is detonating a booster the moment it is created. Patience is key. If you create a Light Ball, do not use it immediately unless you are about to lose. Instead, spend a few moves trying to maneuver a TNT or Rocket next to it. The difference between a standalone Light Ball (clearing one color) and a Light Ball Combo (clearing the board) is often the difference between winning and losing. Scan the adjacent tiles and calculate if you can drop a booster into the correct slot.
4. Prioritizing Objectives Over High Scores
Royal Match is not a game about getting the highest score; it is a game about efficiency. Every level has specific targets displayed in the top left corner, such as "Collect 20 Blue Books" or "Destroy 10 Cupboards." Every move you make must contribute to these goals. Making a flashy match of purple potions is mathematically a bad move if your objective is only green leaves and yellow crowns. You must develop "Objective Tunnel Vision."
This becomes critical in levels with "generating" obstacles, like the Mailboxes that spit out letters or the Magic Hats. In these levels, the board can become cluttered very quickly. You must prioritize clearing the space required to let the generators work, or prioritize hitting the generators themselves. If a level asks for 40 letters, and you spend 10 moves clearing unrelated blocks on the bottom, you will fail because you didn't hit the mailboxes enough times to spawn the required letters.
The Move Counter Economy
Always keep an eye on your remaining moves. The game considers a level "Easy" if you can beat it with many moves left, but "Hard" levels often come down to the very last turn. If you have 5 moves left and need 10 items, stop looking for basic matches. You need a booster. At this stage, you must take high-risk, high-reward moves that might create a TNT or Light Ball, rather than safe moves that only clear 3 items.
5. Navigating Complex Obstacles: A Field Guide
As you progress, King Robert's castle becomes infested with increasingly annoying obstacles. Understanding the durability and mechanics of each is vital.
- Single-Hit Blockers (Grass, Honey): These are soft obstacles. They break with one adjacent match. However, they often hide items underneath. The strategy here is "mowing"—clear them systematically to reveal the board.
- Multi-Hit Blockers (Cupboards, Crates, Ice): These require multiple interactions to break. TNT is most effective here because one explosion counts as a "hit" on multiple blockers, and the subsequent shifting of tiles often triggers a cascade that hits them again.
- Spreading Blockers (Ivy): These are the most dangerous. If you make a move that does not destroy a piece of Ivy, it will grow and consume a nearby tile. You must prioritize Ivy above all else. If you ignore it for three moves, it can choke off your board and make the level impossible.
Color-Dependent Obstacles
Some obstacles, like the Magic Potions or Colored Safes, only respond to matches of a specific color. For example, a Red Safe can only be cracked by matching red tiles next to it. In these scenarios, the color red becomes the most valuable currency on the board. You should use your non-red moves to "fish" for red tiles, clearing out blue and green waste to increase the density of red tiles near the safe.
6. The "Butler’s Gift" and Momentum Management
The "Butler’s Gift" is perhaps the most important mechanic for maintaining a winning streak. It rewards consecutive victories with starting boosters.
- 1 Win: Start with a Rocket and a Propeller.
- 2 Wins: Start with Rocket, Propeller, and TNT.
- 3+ Wins: Start with Rocket, Propeller, TNT, and usually a Light Ball or extra moves depending on the specific event version.
Starting a level with a TNT and Rocket already on the board is a massive advantage. It allows you to open up the board immediately. Therefore, your primary meta-strategy is to protect your streak. If you are about to lose a level and you have a maxed-out Butler’s Gift active, it is often worth using in-game items (like the Royal Hammer) or even spending 900 coins for extra moves to save the streak. Losing the streak forces you to play "naked" levels to build it back up, which is much harder and risks getting stuck.

7. Strategic Economy: Coins, Lives, and Teams
The in-game economy is designed to tempt you into spending real money, but it is entirely possible to play for free with discipline. Coins are the most valuable resource. You should never spend coins on refilling lives (lives regenerate over time) or buying boosters in the shop. The only valid use for coins is purchasing 5 Extra Moves at the end of a level when you are absolutely certain—100% certain—that those 5 moves will result in a win.
Joining an active Team is mandatory. A good team provides two essential benefits:
- Free Lives: You can request lives from teammates every 4 hours. In an active team, your life bar will always be full.
- Team Chests: Active teams complete weekly challenges that award substantial amounts of coins and boosters. If your team is inactive, leave immediately and search for a "Platinum" or "Diamond" league team that requires a minimum level to join.
8. Dominating Events: Sky Race, Lightning Rush, and King's Cup
Royal Match is constantly running competitive events. The Sky Race and Lightning Rush are short-term competitions where you race against 4 other players to complete levels the fastest. Winning these provides massive coin injections (often 500-1000 coins). To maximize your win rate here, try to log in during "off-peak" hours if possible, or save your "Unlimited Lives" rewards (often usually 30 minutes or 1 hour) for when these events start.
The Card Collection albums are long-term events. As you play, you collect card packs. Completing sets awards badges and massive prizes. Do not worry about chasing specific cards; just play consistently. The duplicate cards you collect go into a "Star Chest" which, when opened, guarantees a missing card or high-tier boosters. Save your Star Chest openings for when you are one card away from completing a high-value set to ensure you get the best payout.
9. Advanced Tactics for "Super Hard" Levels
Every 10 to 20 levels, you will encounter a level marked with a skull (Super Hard). These are designed to be roadblocks.
- The Pre-Move Reset: This is a secret tip known only to experts. When you load into a level, look at the board before you make your first move. If the layout is terrible (e.g., no matches near the obstacles, no potential boosters), you can pause the game and hit "Quit Level." You will NOT lose a life. You only lose a life if you have made a move. You can reroll the starting board as many times as you want until you get a favorable setup.
- The Choke Point Theory: Super Hard levels often feature "hourglass" shapes or separated rooms connected by a single portal. Your entire focus must be on widening that choke point. If tiles cannot flow from top to bottom freely, you cannot get the cascades necessary to win. Ignore easy matches in the open areas and focus strictly on breaking the bottleneck.
10. Psychological Traps and Final Mental Tips
The game employs subtle psychological tricks to make you fail. The most common is the Idle Hint. If you don't move for a few seconds, the game will highlight a potential match. Ignore this. The game's AI usually highlights the first available match it finds, which is rarely the best match. It often suggests a move that breaks a potential combo or wastes a turn on a useless part of the board. Always look for your own move first; only use the hint if you are truly stumped.
Another trap is the "Near Miss" feeling. You might fail a level needing just one more move. The game will immediately offer you 5 extra moves for 900 coins. In the heat of the moment, you might tap "Yes" out of frustration. Pause. Take a breath. Look at the board. Is it actually winnable in 5 moves? Or are the remaining objectives too spread out? Emotional spending is the quickest way to drain your coin bank.
Conclusion
Royal Match is a masterclass in accessible yet deep puzzle design. While the colorful graphics invite you in, the complex mechanics of gravity, booster synergy, and economic management keep you engaged. By shifting your mindset from casual matching to strategic planning—visualizing cascades, hoarding coins for emergencies, and maximizing the power of the Butler's Gift—you can conquer even the most nightmarish of King Robert's levels.
Remember that patience is your strongest booster. Take the time to analyze the board, look for the Light Ball + TNT combo, and never trust the idle hints. With these strategies in hand, you are well-equipped to restore the castle to its former glory and climb the global leaderboards.
Master Royal Match by using the "Pre-Move Reset" trick, prioritizing Light Ball+TNT combos, maintaining Butler's Gift streaks, and joining active teams for coins.